Migrating your old TFVC repository to Git with full history in Azure DevOps
- Posted in:
- Git
There might be many reasons for you or your organization to migrate your old repositories in TFVC to Git and you would like the keep the history of the check-ins/commits, here I will explain two ways of achieving this.
- Migrating using git-tfs, with this you can migrate with full history and it is a little complex process.
- Migrating using Import repository wizard in Azure DevOps, with this you can migrate with 180 days history and it is a very simple process.
In my case, I had to choose option 1 as my project was older than 4 years and I wanted to get the history for it.
1. Migrating using git-tfs
Get git-tfs by following the instructions mentioned at git-tfs/README.md, I installed it through Chocolatey which I already had installed, chocolatey is a nice and easy way to install and upgrade software/programs/packages on windows, do check it out if you haven't used it yet, it is a package manager for windows.
- Run cmd as administrator
- Install git-tfs by running choco install gittfs
- Verify if git-tfs is installed correctly by running git-tfs --version
- You should see its version information like below
C:\WINDOWS\system32>git-tfs --version
Found matching Visual Studio version at C:\Program Files (x86)\Microsoft Visual Studio\2019\Professional
git-tfs version 0.32.0.0 (TFS client library 16.0.0.0 (MS)) (64-bit)

Note: If you want to force git-tfs to use another version of the tfs client library,
set the environment variable `GIT_TFS_CLIENT` with the wished version (ie: '2015' for Visual Studio 2015,...)
Supported version: 2019, 2017, 2015
- Run the command git tfs clone [URL] [TFVS_Project] “[Local_Git_folder]” after changing placeholder values of URL, TFVS_Project, Local_Git_folder. In my case it was like below:
C:\WINDOWS\system32>git tfs clone https://arunendapally.visualstudio.com/defaultcollection/ $/donna-bot "C:\Arun\Project\donna-bot-new"
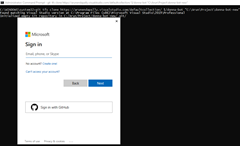
and after you hit the enter key, it will prompt you to login
- This process will take a while to get everything cloned into the local git folder location you mentioned while running the command. You should see something like below

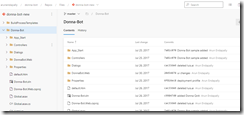
- If you open the location in explorer you should see files cloned like below

- If you want to see the git logs, you can run this command git log --all --oneline --decorate --graph and you would see something like below

- Now you can open that folder in VS Code, clean-up any files you don't need, and add .gitignore for the files you want to exclude in the commit.
- Now set the git origin to the repository where you want to commit and push this project. You can run the below command replacing your git origin URL
git remote add origin https://arunendapally.visualstudio.com/DefaultCollection/donna-bot/_git/donna-bot-new
git push -u origin --all
- After running it I can it pushed all my changes to my remote with complete history

- I hope you guys successfully migrated from TFVC to Git without any problem, if you are stuck, you can reach out to me, I can try to help.
2. Migrating using Import repository wizard in Azure DevOps
You can choose this option when you do not really care about the history greater than 180 days, and of course if you are not deleting the old TFVC repo, you can always get back to see the history.
As this is a simple approach you can simply follow these instructions Import repositories from TFVC to Git - Azure Repos | Microsoft Docs and you would be able to migrate from TFVC to Git repo with 180 days history.
