It has become a challenging task to start a new project using Angular and ASP.NET Core though there is an Angular project template provided in Visual Studio 2017 using which we can create an Angular 4 application with ASP.NET Core 2.0 which is useful to explore and learn but it becomes difficult if we need to upgrade it from Angular 4 to Angular 5 or 6. I always feel it is better to learn by creating a project with an empty solution and add more things to it when required so that we have complete control on our solution.

As a prerequisites, you would need the install the following if they are not already installed:

  1. Visual Studio 2017
  2. Node.js and npm latest version
  3. ASP.NET Core 2.0

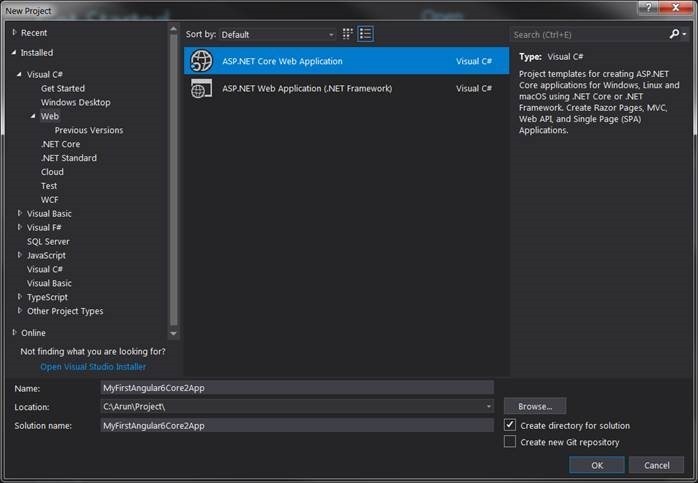
Steps for creating an App with Angular 6 & ASP.NET Core 2.0 using Visual Studio 2017

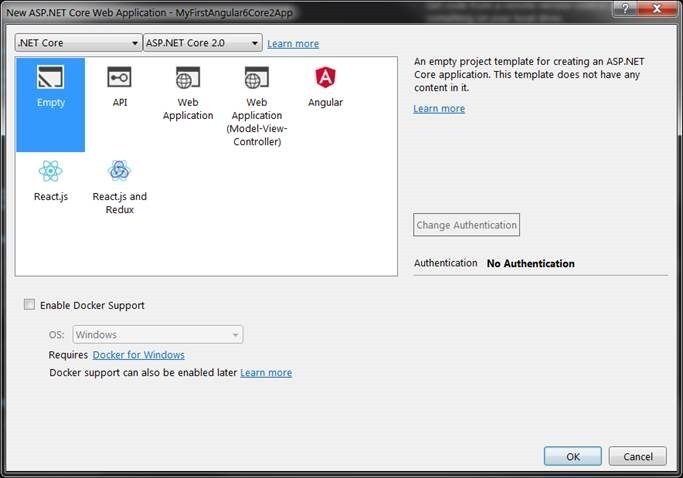
1. Create a new ASP.NET Core Web Application.

clip_image002_thumb

2. Choose empty template and click OK.

clip_image004_thumb

3. You should be able to see a solution with ASP.NET Core 2.0 application.

clip_image006_thumb

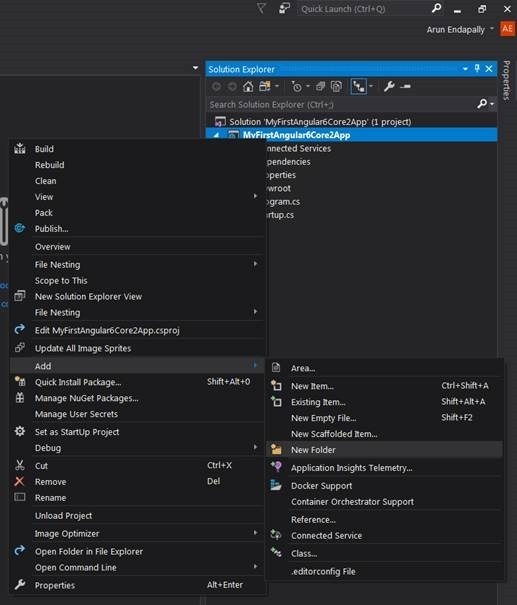
4. Right click on the project, add new folder and name it as Controllers.

clip_image008_thumb

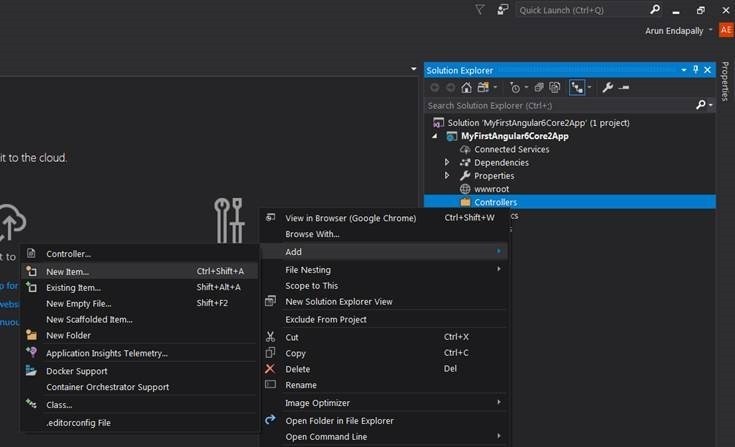
5. Right click on the Controllers folder, Add new Item by right clicking on Controllers folder and click Add > Controller and name it ValuesController.

clip_image010_thumb

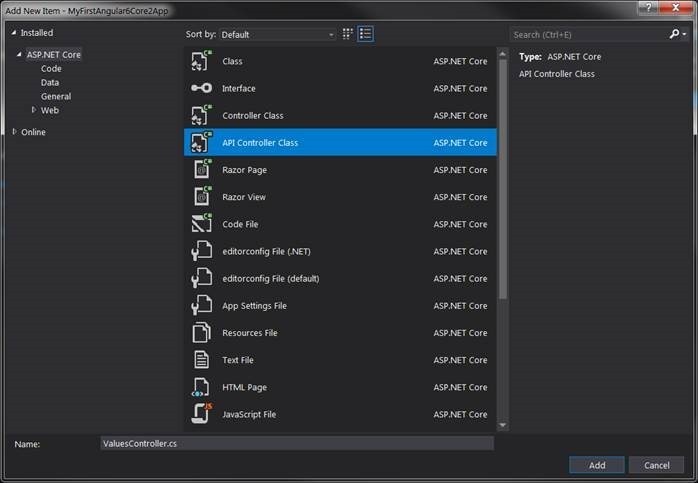
6. Select API Controller and click Add

clip_image012_thumb

7. Now you would see ValuesController in the Controllers folder.

8. Hit Ctrl + F5 to run it, you would see “Hello World!” on your browser.

clip_image014_thumb

9. Try to navigate to localhost:<Port>/api/values, you would still see “Hello World!” instead of ValuesController as you still need to configure Startup.cs.

10. Update Startup.cs as shown below.

public class Startup
{
  // This method gets called by the runtime. Use this method to add services to the container.
  // For more information on how to configure your application, visit https://go.microsoft.com/fwlink/?LinkID=398940
  public void ConfigureServices(IServiceCollection services)
  {
    services.AddMvc();
  }

  // This method gets called by the runtime. Use this method to configure the HTTP request pipeline.
  public void Configure(IApplicationBuilder app, IHostingEnvironment env)
  {
    if (env.IsDevelopment())
    {
      app.UseDeveloperExceptionPage();
    }

    app.UseMvc();

    app.UseDefaultFiles();
    app.UseStaticFiles();
    //app.Run(async (context) =>
    //{
    //  await context.Response.WriteAsync("Hello World!");
    //});
  }
}

11. Now when you refresh you browser with url localhost:<Port>/api/values you would be able to see the below.

image_thumb

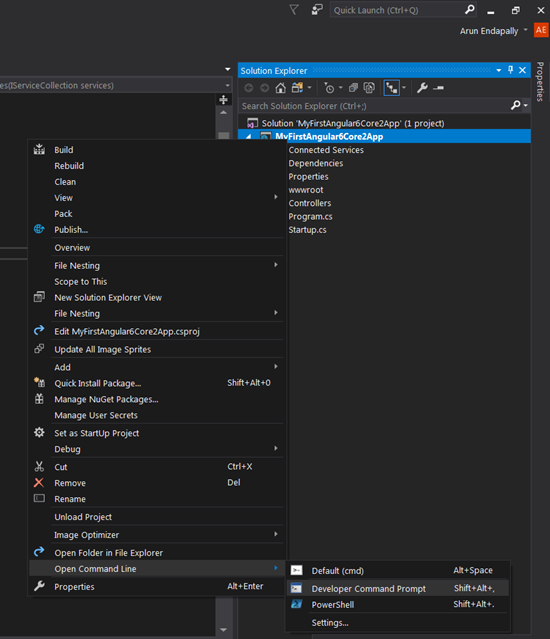
12. Now its time to add Angular 6 app through Angular CLI to the same project, to do that first open Developer Command Prompt.

image_thumb68

13. Then install Angular CLI globally using the below command in the Developer Command Prompt.

npm install -g @angular/cli

14. After installing Angular CLI globally, now navigate to Solution folder using command cd.. and then

run ng new MyFirstAngular6Core2App. Note that here name of the Angular App should be same as name of  ASP.Net Core project, in my case it is MyFirstAngular6Core2App.

image_thumb1

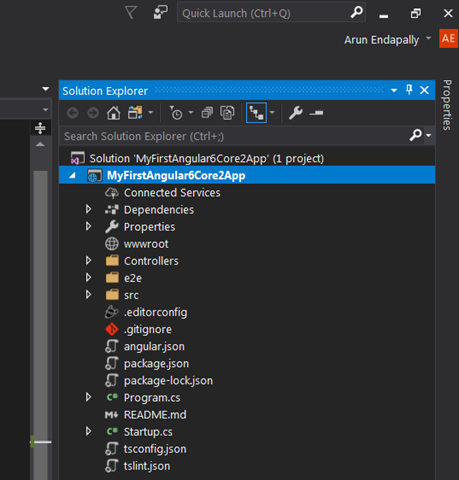
15. Angular App would be created in your solution and your solution would look like below.

image_thumb5

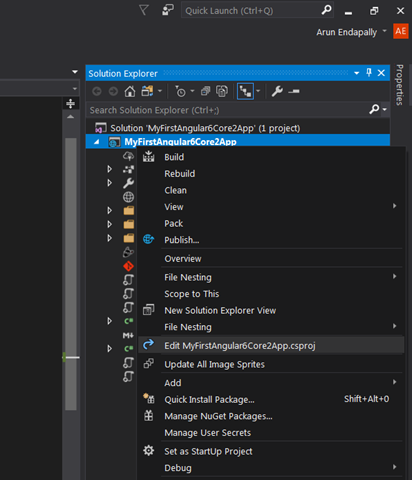
16. Now before running the Angular App, we need to configure few things for that first edit the .csproj file.

image_thumb3

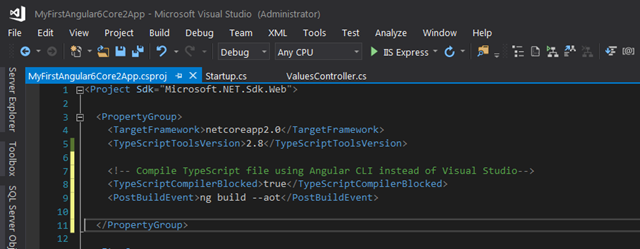
17. Modify the .csproj file, under the PropertyGroup add <TypeScriptCompilerBlocked>true</TypeScriptCompilerBlocked> <PostBuildEvent>ng build --aot</PostBuildEvent> as shown below, this will compile the TypeScript files using Angular CLI instead of Visual Studio.

image_thumb7

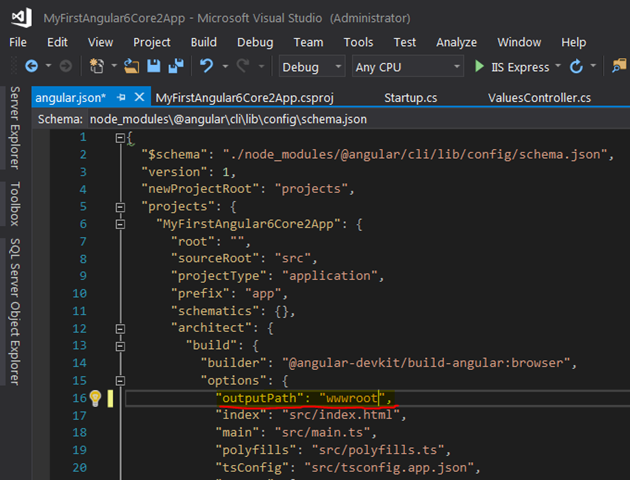
18. Now edit angular.json file and set the outputPath to wwwroot. This setting will make sure that Angular CLI will copy the assets to wwwroot after the build (Cntrl + F5).

image_thumb9

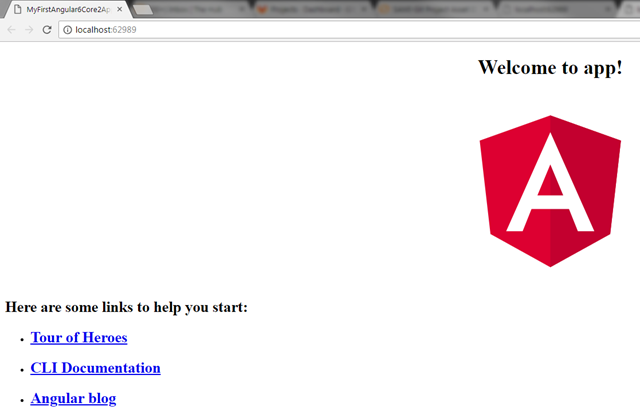
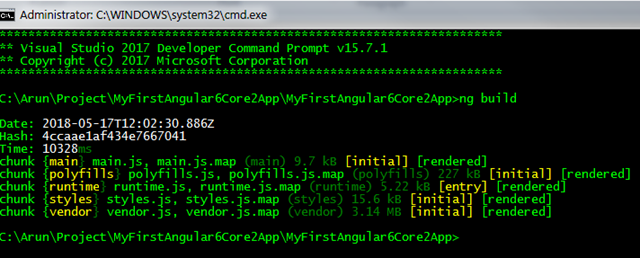
19. Now execute ng build in Developer Command Prompt to build the angular App and hit Cntrl + F5 in Visual Studio to run the App and you should see the below App in the browser.

image_thumb11

20. To call ValuesController from Angular App we need modify app.module.ts, app.component.ts and app.component.html as follows:

app.module.ts

import { BrowserModule } from '@angular/platform-browser';
import { NgModule } from '@angular/core';
import { HttpModule } from '@angular/http';

import { AppComponent } from './app.component';

@NgModule({
  declarations: [
    AppComponent
  ],
  imports: [
    BrowserModule,
    HttpModule
  ],
  providers: [],
  bootstrap: [AppComponent]
})
export class AppModule { }

app.component.ts

import { Component, Inject } from '@angular/core';
import { Http } from '@angular/http';

@Component({
  selector: 'app-root',
  templateUrl: './app.component.html',
  styleUrls: ['./app.component.css']
})

export class AppComponent {
  title = 'app';
  public values: string[];

  constructor(private http: Http) {
    this.http.get('/api/values').subscribe(result => {
      this.values = result.json() as string[];
    }, error => console.error(error));
  }

}

app.component.html

<!--The content below is only a placeholder and can be replaced.-->
<div style="text-align:center">
  <h1>
    Welcome to {{ title }}!
  </h1>
  <p *ngIf="!values"><em>Loading...</em></p>

  <div style="height: 350px; overflow: auto">
    <table class='table' *ngIf="values">
      <thead>
        <tr>
          <th>Values</th>
        </tr>
      </thead>
      <tbody>
        <tr *ngFor="let value of values">
          <td>{{ value }}</td>
        </tr>
      </tbody>
    </table>
  </div>
</div>

21. Run ng build in Developer Command Prompt.

image_thumb2

22. Hit Ctrl + F5 in Visual Studio to run it and you should see the below in your browser.

image_thumb4


You can download source code from https://github.com/arunendapally/MyFirstAngular6Core2App
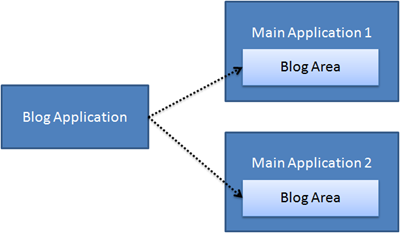
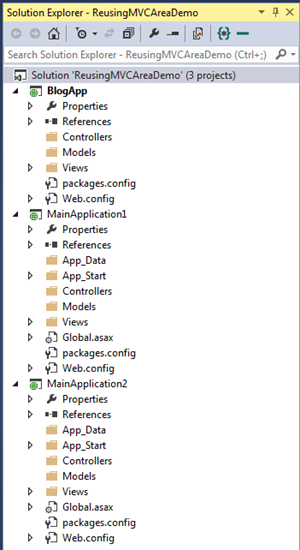
ASP.NET MVC Areas can be very useful not only for organizing code or separating an application into smaller modules but also we can reuse the same area in multiple applications. As you can see from below solution structure, Blog is a separate web application which is used as an area in Main Application 1 and Main Application 2. This design gives us a scope for cleaner separation of code, reusability and maintainability. If you are new to Areas in MVC please refer to walkthrough for creating an Area in ASP.NET MVC and If you are not a beginner you can directly jump to step 13.

image

To implement the above, lets begin by creating the blank solution as follow:

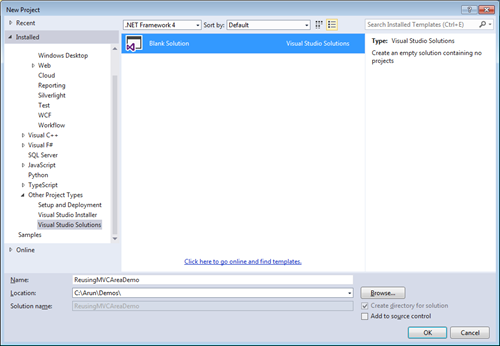
1. Open Visual Studio > File > New Project. In the new project window, expand Other Project Types > select Visual Studio Solutions > select Blank Solution.

image

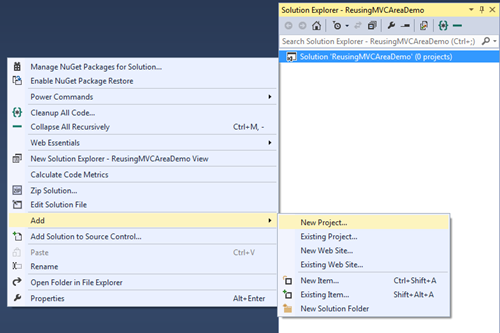
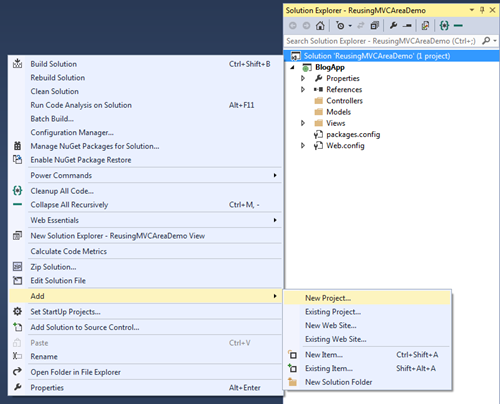
2. Right click on the solution, click Add and then select New Project.

image

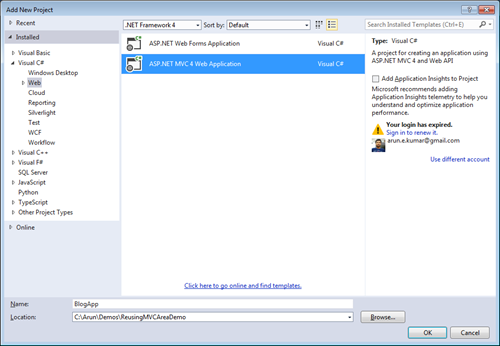
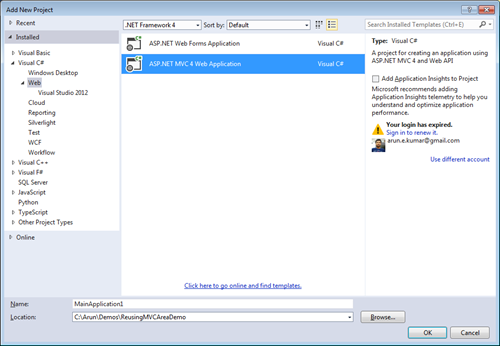
3. Create a Blog Application by expanding Visual C# > select Web > select ASP.NET MVC Web Application > enter Name > click OK.

image

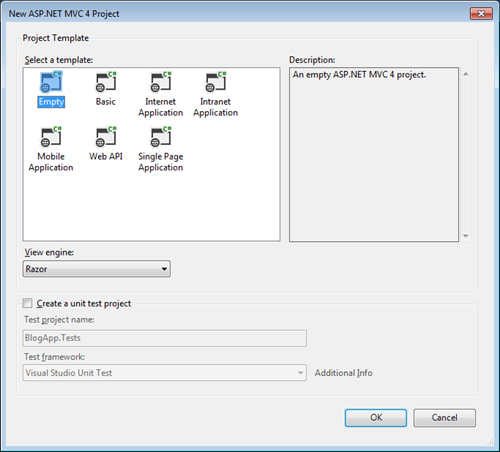
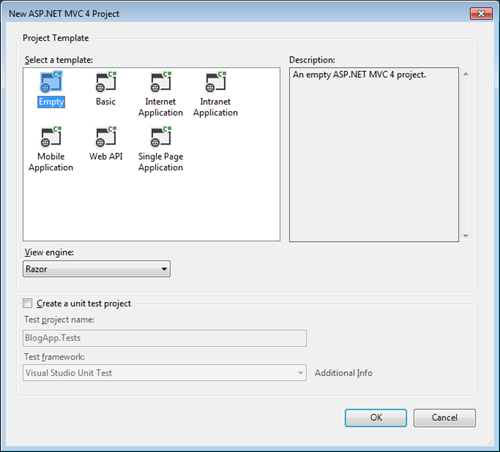
4. Select an Empty template and click on OK.

image

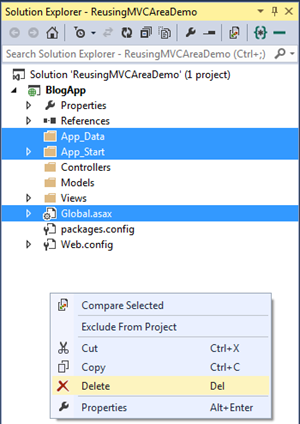
5. In the Blog App, you can delete App_Data, App_Start and Global.asax as the BlogApp is an Area these files are not required.
image

6. Now again right click on the solution, click Add and then select New Project.

image

7. Create a Main Application 1 by expanding Visual C# > select Web > select ASP.NET MVC Web Application > enter Name > click OK.

image

8. Select an Empty template and click on OK.

image

9. Similarly create Main Application 2, your solution should look like below.

image

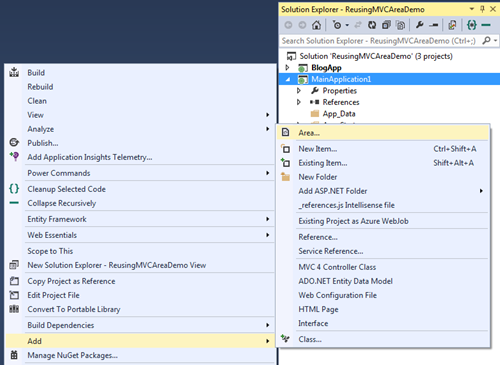
10. Right click on Main Application 1 > select Add > click on Area.

image

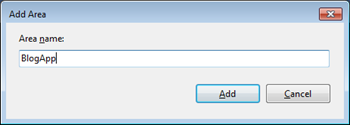
11. Enter the Area name and click on Add.

image

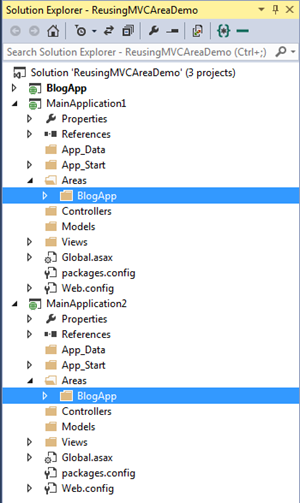
12. Similarly add BlogApp area in Main Application 2, your solution should now look like below.
image

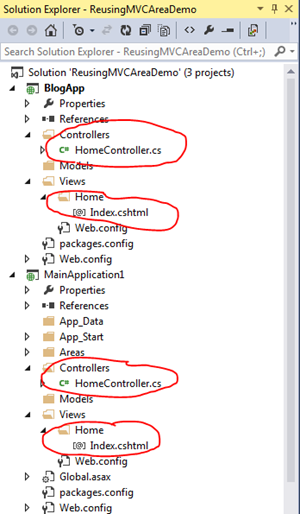
13. Now create HomeController and Add View for Index action all the three applications i.e. BlogApp, MainApplication1 and MainApplication2.

image

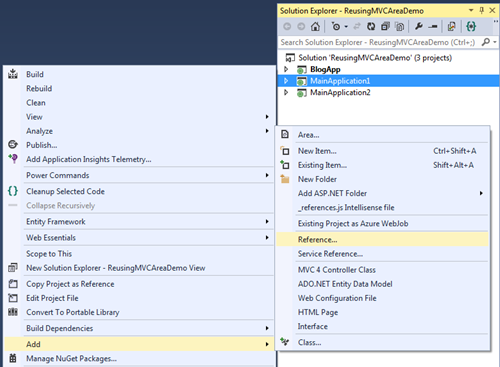
14. Right click on MainApplication1 > click Add > click Reference.

image

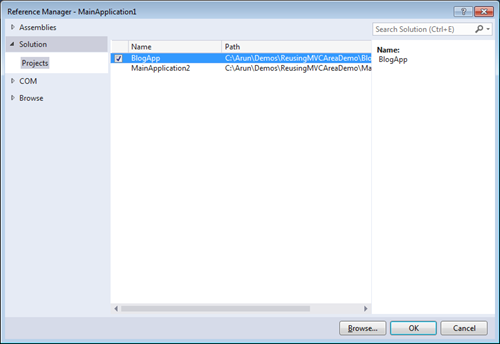
15. In Reference Manager > select Solution > select BlogApp and click on OK.

image

16. Similarly Add BlogApp as reference to MainApplication2.

17. Build the solution hitting Ctrl + Shift + B, set MainApplication1 as Startup Project and then hit Ctrl + F5 to run it. As I have controller with same name HomeController it will throw the below server error

Multiple types were found that match the controller named 'Home'. This can happen if the route that services this request ('{controller}/{action}/{id}') does not specify namespaces to search for a controller that matches the request. If this is the case, register this route by calling an overload of the 'MapRoute' method that takes a 'namespaces' parameter.
The request for 'Home' has found the following matching controllers:
MainApplication1.Controllers.HomeController
BlogApp.Controllers.HomeController

18. To fix the above go to RouteConfig.cs in MainApplication1 > App_Start and Add the namespace as shown below.

public static void RegisterRoutes(RouteCollection routes)
{
  routes.IgnoreRoute("{resource}.axd/{*pathInfo}");

  routes.MapRoute(
      name: "Default",
      url: "{controller}/{action}/{id}",
      defaults: new { controller = "Home", action = "Index", id = UrlParameter.Optional },
      namespaces: new string[] { "MainApplication1.Controllers" }
  );
}

19. Similarly go to BlogAppAreaRegistration.cs in MainApplication1 > Areas > BlogApp and add namespace as shown below.

public override void RegisterArea(AreaRegistrationContext context)
{
  context.MapRoute(
      "Blog_default",
      "Blog/{controller}/{action}/{id}",
      new { action = "Index", id = UrlParameter.Optional },
     new string[] { "BlogApp.Controllers" }
  );
}

20. Similarly add namespace to both RouteConfig and BlogAreaRegistration of MainApplication2.

21. Build solution and Run MainApplication1. You should see the below output.

image

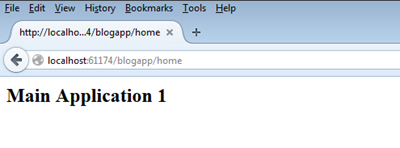
22. Now try to navigate to BlogApp Home by typing http://localhost:<port>/blogapp/home in the address bar of the browser. You see that it runs fine but the view rendered is still MainApplication > Views > Home > Index.cshtml.

image

23. From the above we can observe that BlogApp Controllers are added as reference to MainApplication1 and MainApplication2 but BlogApp Views still need to be copied into both MainApplication1 and MainApplication2 to make it work.

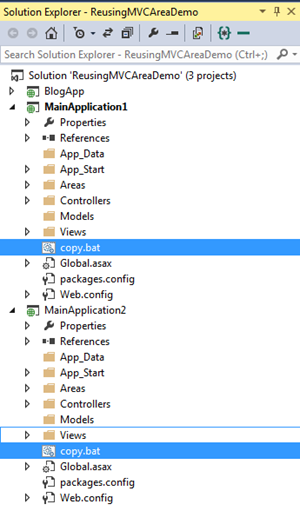
24. Using xcopy we can copy the views inside BlogApp into both MainApplication1 and MainApplication2, to do that you can create a batch file copy.bat.

image

25. In the copy.bat of MainApplication1 paste the below. The below lines is for copying views in BlogApp and pasting it in MainApplication1 > Areas > BlogApp > Views.

xcopy /C /E /F /R /Y /I "C:\Arun\Demos\ReusingMVCAreaDemo\BlogApp\Views" "C:\Arun\Demos\ReusingMVCAreaDemo\MainApplication1\Areas\BlogApp\Views"

26. Similarly in the copy.bat of MainApplication2 paste the below. The below lines is for copying views in BlogApp and pasting it in MainApplication2 > Areas > BlogApp > Views.

xcopy /C /E /F /R /Y /I "C:\Arun\Demos\ReusingMVCAreaDemo\BlogApp\Views" "C:\Arun\Demos\ReusingMVCAreaDemo\MainApplication2\Areas\BlogApp\Views"

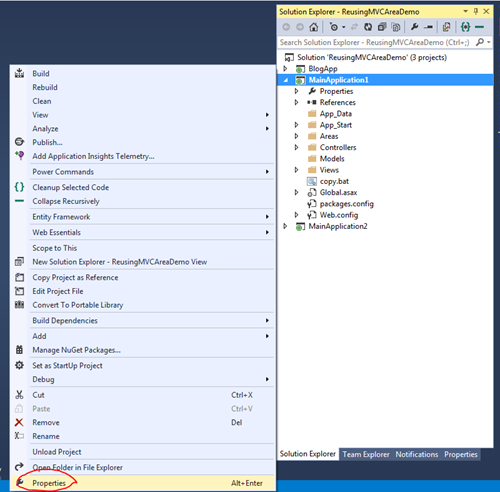
27. Now to make this copy.bat run, Right click MainApplication1 > click on Properties.

image

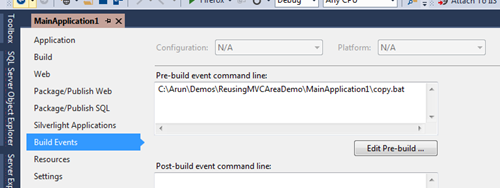
28. Select Build Events > Pre-build event command line > paste C:\Arun\Demos\ReusingMVCAreaDemo\MainApplication1\copy.bat. That will make copy.bat run when we build/rebuild application and do not forget to save the solution.

image

29. Similarly add pre-build event command line argument to MainApplication2 by pasting C:\Arun\Demos\ReusingMVCAreaDemo\MainApplication2\copy.bat.

30. Now Rebuild the solution.

image

31. When you rebuild the solution, you should the files being copied in the Output window.

image

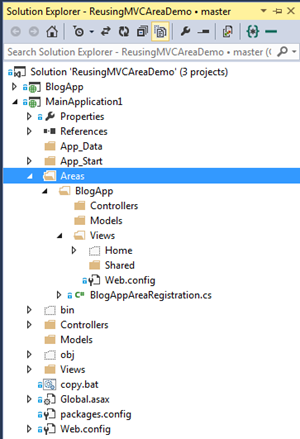
32. As you can see in the below the Home in Areas > Views is in excluded state. This will not stop it from running.

image

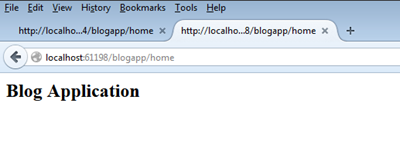
33. Now run MainApplication1 then navigate to /blogapp/home, now you should see view rendering from MainApplication1  > Areas > BlogApp > Views.

image

33. Similarly set MainApplication2 as startup project, run it and then navigate to /blogapp/home and you see the below.

image

34. Add Actions links to navigate.

In BlogApp > Views > Home > Index.cshtml

@{
    ViewBag.Title = "Index";
}

<h2>Blog Application</h2>

@Html.ActionLink("Home", "Index", "Home", new { area = "" }, null)

In MainApplication1 > Views > Home > Index.cshtml

@{
    ViewBag.Title = "Index";
}

<h2>Main Application 1</h2>

@Html.ActionLink("Blog App", "Index", "Home", new { area = "BlogApp" }, null)

In MainApplication2 > Views > Home > Index.cshtml

@{
    ViewBag.Title = "Index";
}

<h2>Main Application 2</h2>

@Html.ActionLink("Blog App", "Index", "Home", new { area = "BlogApp" }, null)

Conclusion

BlogApp application is reused as an Area in MainApplication1 and MainApplication2. The two important things we have to do to achieve that is add BlogApp as a reference to the MainApplication1 and MainApplication2 then using copy.bat as a prebuild event we can copy the views into both the Areas.

You can get the source code from https://github.com/arunendapally/ReusingMVCAreaDemo