Many developers are still not aware that Portable Executable (PE) files can be decompiled to readable source code. Before learning how to prevent or make it hard for the decompilers to reverse engineer the source code, we need to understand few basics concepts.

What is a Potable Executable file?

When source code is complied it generates a Portable Executable (PE) file. Portable Executable (PE) is either a dll or an exe. PE file contains MSIL (Microsoft Intermediate Language) and Metadata. MSIL is ultimately converted by CLR into the native code which a processor can understand. Metadata contains assemble information like Assembly Name, Version, Culture and Public Key.

How can we get source code from dll or exe?

Yes, we can get the source code from dll or exe. To demonstrate this let create a simple application first.

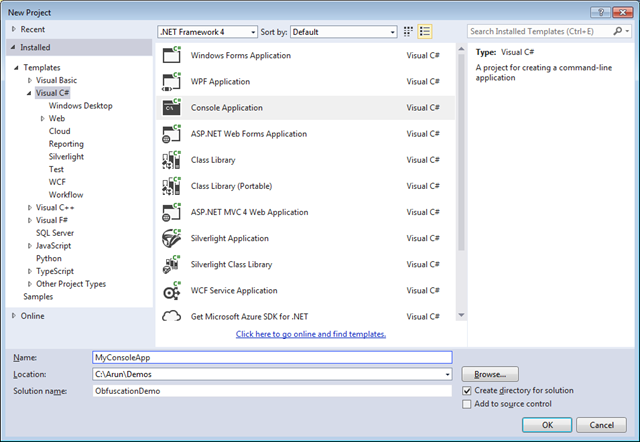
Open visual studio, create a new project and select console based application.
image

Add some sample code into the Program.cs

using System;

namespace MyConsoleApp
{
  internal class Program
  {
    private static void Main(string[] args)
    {
      Console.WriteLine(PublicMethod());
      Console.WriteLine(PrivateMethod());
    }

    public static string PublicMethod()
    {
      // Your source code here
      return "Public Method";
    }

    private static string PrivateMethod()
    {
      // Your source code here
      return "Private Method";
    }
  }
}

Now build the application, an exe will be generated in the bin/debug folder

image

Now lets try to get the source code from the exe file. For the first open visual studio command prompt.

image

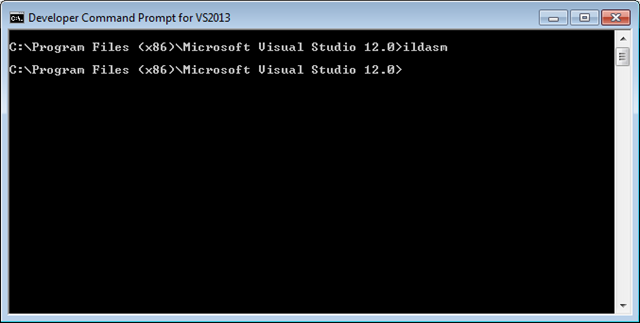
Type ildasm and hit enter. IL DASM is MSIL Disassembler. It basically has an ability to read Intermediate Language.
image

IL DASM will open, now open the exe file we created.
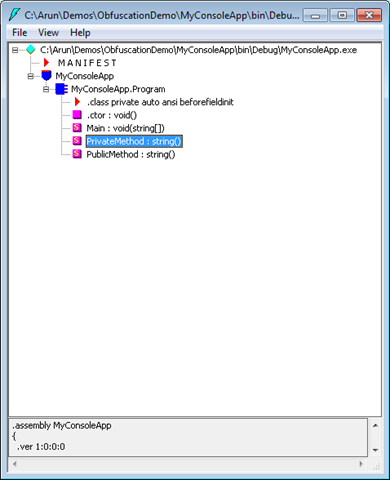
image

As we can see IL DASM disassembles the exe and lots of useful information can be retrieved, though it do not provide the original source code completely a lot can be interpreted. The easy way to reverse engineer and get the exact source code there decompliers available in the market for free such as Telerik JustDecompile and Jet Brains dotPeek through which can convert the Intermediate Language into the original source code.
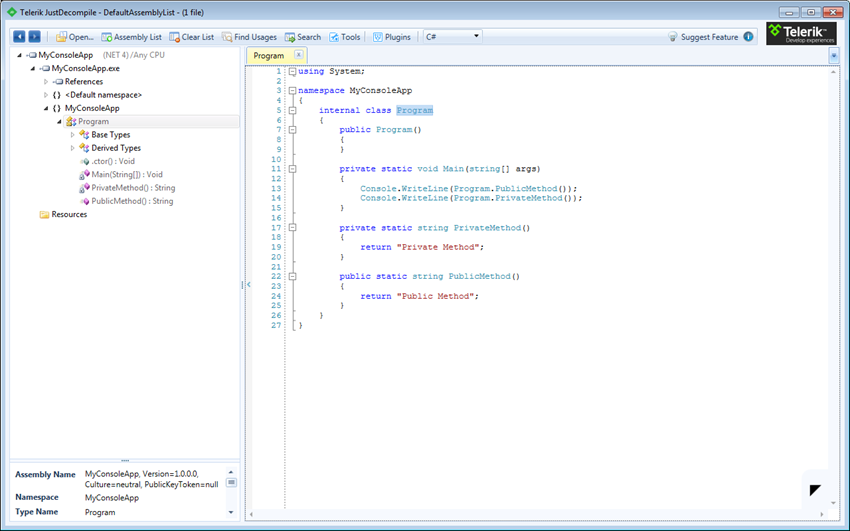
image

As we can see in the above screenshot when we open the exe with Telerik JustDecompile we are able to see the original source code, this can lead to piracy and ultimately you can loose your profits.

How to prevent exe and dll from getting decompiled?

The process of protecting the exe and dll from getting decompiled into original source code is called Obfuscation. There are lot of paid and free software available to Obfuscate the .Net assemblies, Dotfucator from PreEmptive Solutions is one of the popular and their community edition is free and included with the visual studio, if you are interested in buying other version check out this comparisons. The Dofuscator community edition has limited features and the professional edition is very expensive. So instead of gaining profits by protecting them from reverse engineering we will end up spending a lot on Obfuscation.

The one of best alternate utility for obfuscating is ConfuserEx it is a completely free and opensource. You can ConfuserEx download from here.

After downloading, extract the zip into a folder and then run ConfuserEx.exe
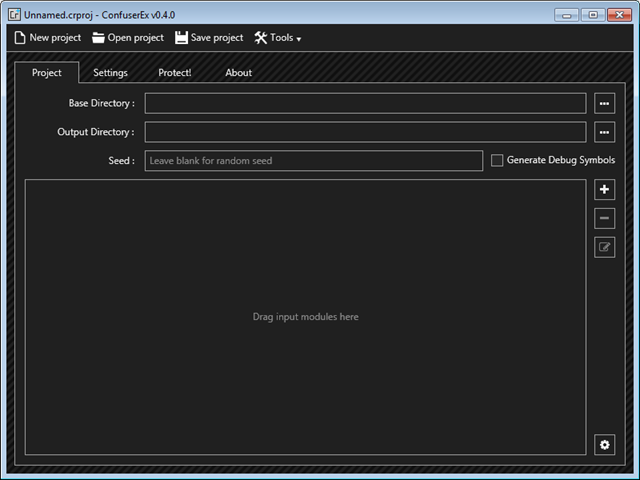
image

Drag and drop the exe you want to protect on the ConfuserEx or you can manually select Base Directory, Output Directory and add the ddl or exe.
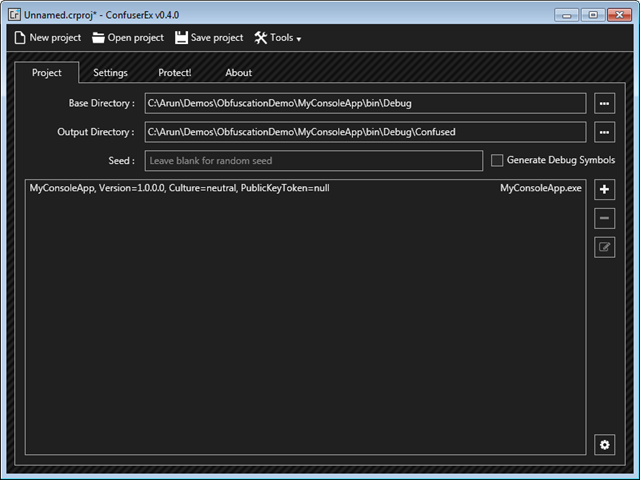
image

Once you have done setting up the directories and adding dll or exe, go to the Settings tab in ConfuserEx. You can either add rules to Gobal settings or set individually for each dll or exe.
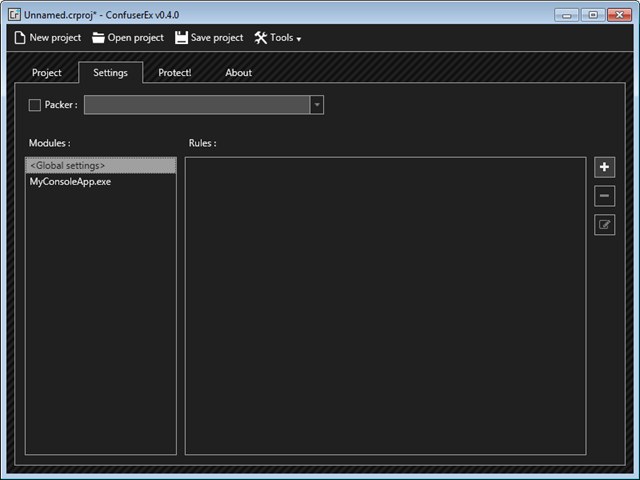
image

Click on “+” button, you will see “true” under Rules. Now click on edit rule (button below “-”).
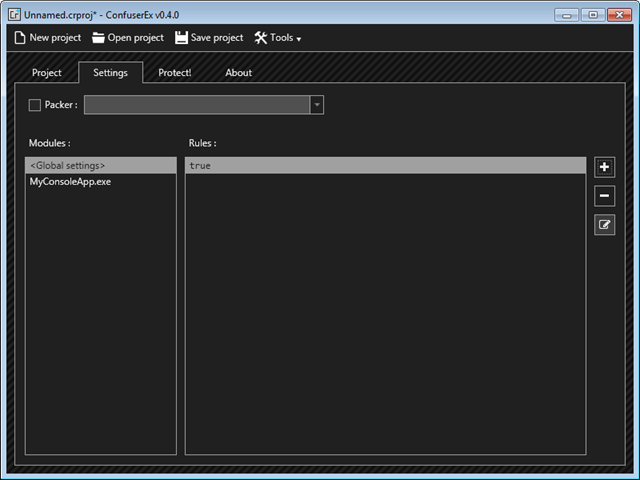
image

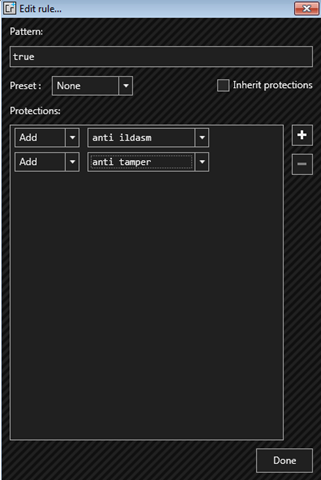
On clicking edit rule a new window will appear as shown below. Click on “+” button
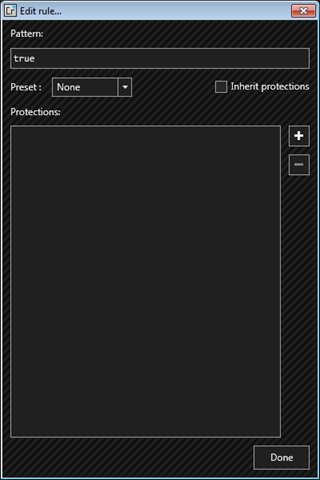
image

You can select different ways of add levels of protection. If you want to learn Obfuscation in depth check out this article.
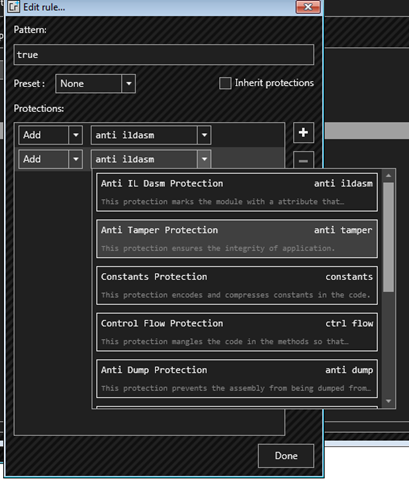
image

Select only with “Anti IL Dasm” and “Anti Tamper”, that is enough for making it hard enough to reverse engineer for the decompilers.
image

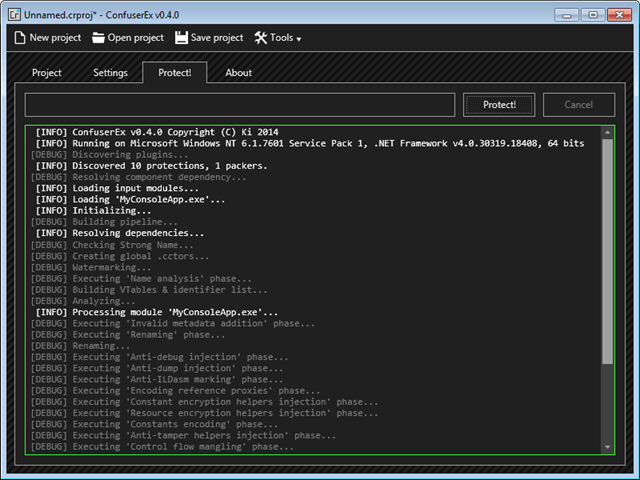
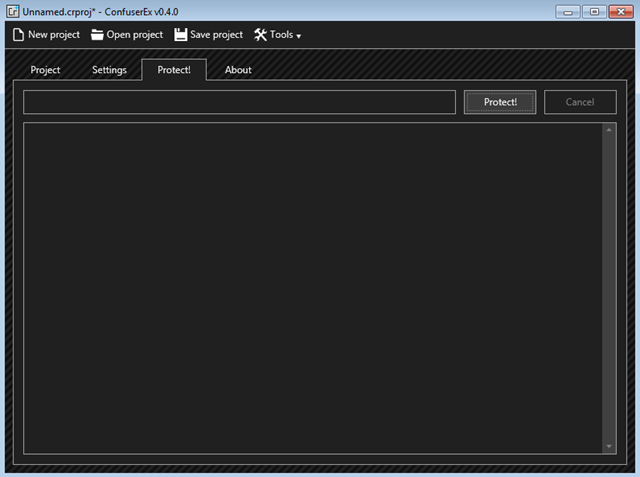
After you click on Done, go to Protect tab and click on Protect button.
image

image

You can find the protected dll or exe in the output directory selected.

image

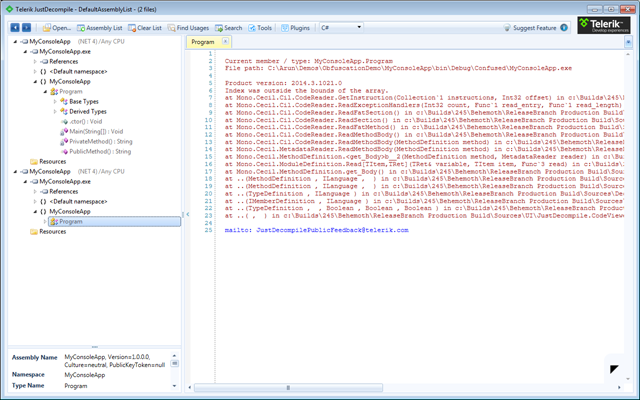
Test the exe or dll generated by ConfusedEx and check if it is working as usual. Now try to decompile it with a decompiler.
image

As we can see the confused dll or exe which gets generated by ConfuserEx cannot be decompiled any more.
What is Single Sign On (SSO)?

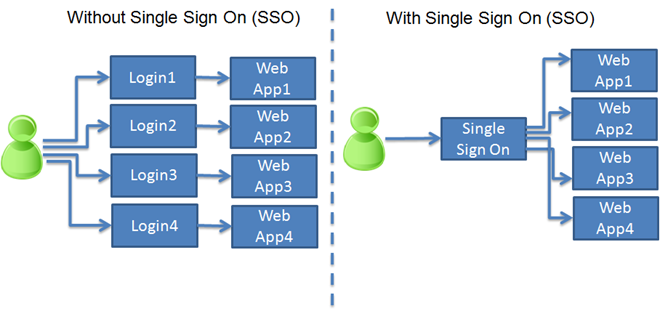
To access any secured page in a web application, the user needs to authenticate and if the user want to access multiple web applications then the user have to login for each of those application individually. Logging in multiple times can be eliminated with Single Sign On i.e. user has to login only once and can access web multiple applications.

image

How to enable Single Sign On?

The key for enabling Single Sign On is machineKey and authentication (forms). All the Web Applications should have the same configuration to make it work.

    <machineKey validationKey="<MachineKey>" 
                decryptionKey="<DecryptionKey>" validation="<CryptoAlgorithm>" decryption="<CryptoAlgorithm>" />
    <authentication mode="Forms">
      <forms name="SingleSignOn" loginUrl="<SSOLoginURL>" timeout="480" slidingExpiration="true">
       </forms>
    </authentication>

How to implement Single Sign On in ASP.NET MVC?

Implementing SSO in ASP.NET MVC is very simple. Below is the step by step approach to implement it.

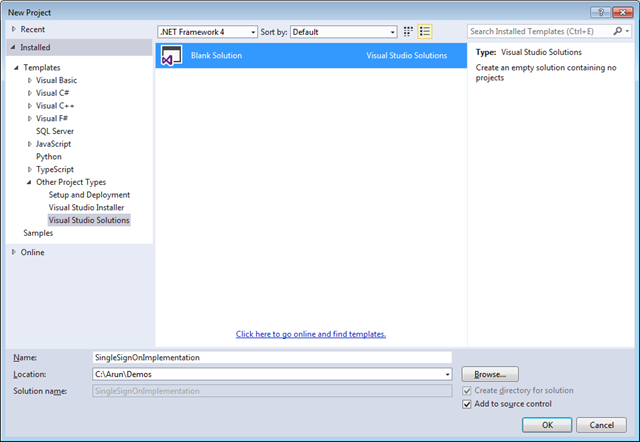
1. Open visual studio, create a blank solution (I always like to start off with a blank solution).

image

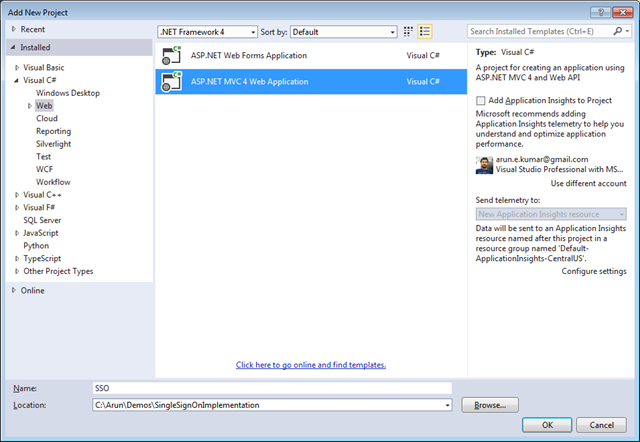
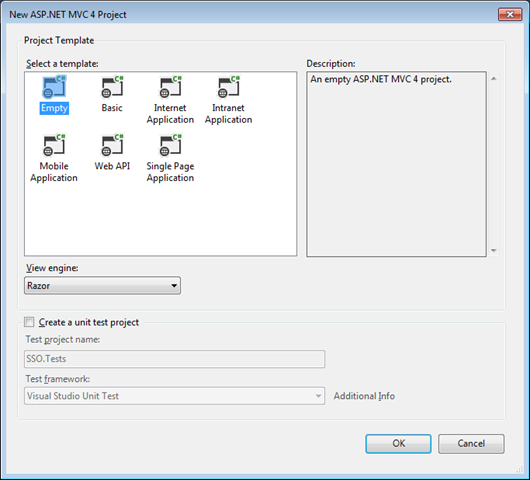
2. Now add three empty ASP.NET MVC Web Applications (SSO, WebApp1 & WebApp2) to the solution.

image

image

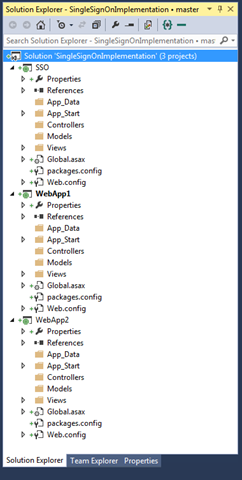
3. The solution should look something like below.

image

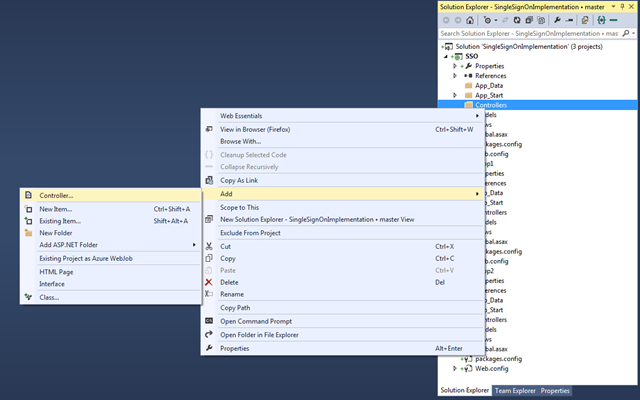
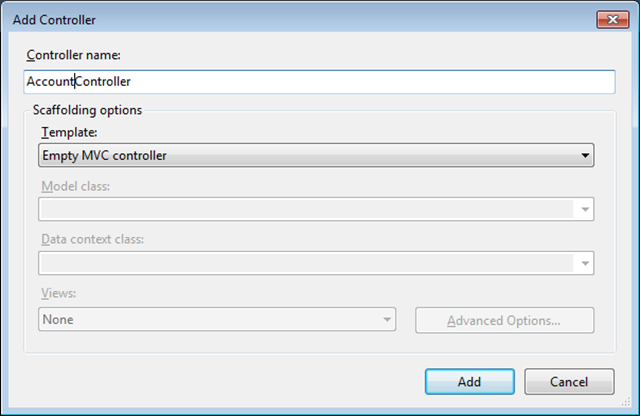
4. Add an AccountController in SSO, this should contain the code for login.

image

image

5. Write some simple forms authentication code like the below in the AccountController. For the demo purpose I am using FormsAuthentication.Authenticate method which will simple check the credentials stored in web.config and authenticates if username and the password are valid, you can also validate username and password stored in sql sever database.

using System.Web.Mvc;
using System.Web.Security;

namespace SSO.Controllers
{
  public class AccountController : Controller
  {
    [AllowAnonymous]
    public ActionResult Login(string returnUrl)
    {
      if (Request.IsAuthenticated)
      {
        return RedirectToAction("Index", "Home");
      }

      ViewBag.ReturnUrl = returnUrl;
      return View();
    }

    [AllowAnonymous]
    [HttpPost]
    [ValidateAntiForgeryToken]
    public ActionResult Login(string username, string password, string returnUrl)
    {
      if (FormsAuthentication.Authenticate(username, password))
      {
        FormsAuthentication.SetAuthCookie(username, false);
        if (!string.IsNullOrEmpty(returnUrl))
        {
          return Redirect(returnUrl);
        }
        else
        {
          return RedirectToAction("Index", "Home");
        }
      }
      else
      {
        ModelState.AddModelError(string.Empty, "Invalid login details");
        ViewBag.ReturnUrl = returnUrl;
        return View();
      }
    }
  }
}

6. Now we need to add a html form in the login view for the users to login.

@{
  ViewBag.Title = "Login";
}

<h2>Login</h2>
@using (Html.BeginForm(new { ReturnUrl = ViewBag.ReturnUrl }))
{
  @Html.ValidationSummary()
  @Html.AntiForgeryToken()
  <div class="form-group">
    @Html.Label("Username")
    @Html.Editor("UserName")
  </div>
  <div class="form-group">
    @Html.LabelForModel("Password")
    @Html.Password("Password")
  </div>
  <input class="btn btn-primary" type="submit" value="Login" />
}

7. Add machineKey to web.config of SSO, WebApp1 and WebApp2. You can create your own machine keys by following this or simple generate online from here. The machineKey should be added under system.web.

  <system.web>
    <machineKey validationKey="E4451576F51E0562D91A1748DF7AB3027FEF3C2CCAC46D756C833E1AF20C7BAEFFACF97C7081ADA4648918E0B56BF27D1699A6EB2D9B6967A562CAD14767F163"
                decryptionKey="6159C46C9E288028ED26F5A65CED7317A83CB3485DE8C592" validation="HMACSHA256" decryption="AES" />

8. Add forms authentication to web.config of SSO, WebApp1 and WebApp2. For WebApp1 and WebApp2 <credentials>…</credentials> is not required as we will authenticate users from only AccountController of SSO.

    <authentication mode="Forms">
      <forms name="SingleSignOn" loginUrl="http://localhost/SSO/Account/Login" timeout="480" slidingExpiration="true">
        <credentials passwordFormat="SHA1">
          <user name="demo" password="89e495e7941cf9e40e6980d14a16bf023ccd4c91"/> <!--password = demo-->
        </credentials>
      </forms>
    </authentication>

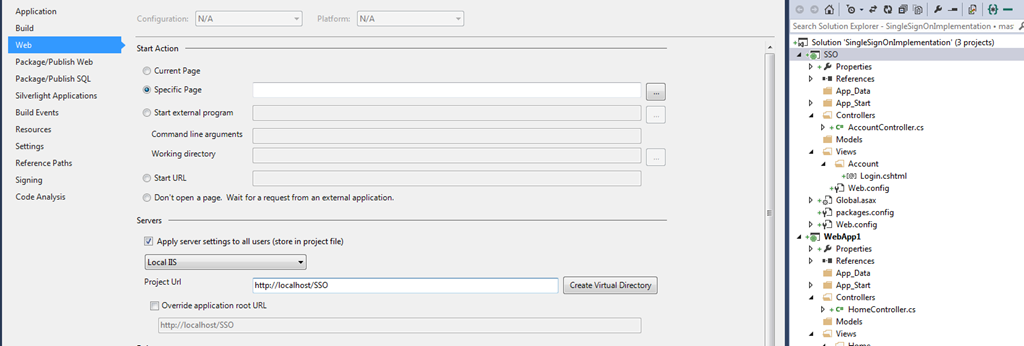
9. As you can see in the above I am using local IIS  localhost/SSOto configure it to run from there simple right click on project select the properties and select web like below.

image  

10. To test Single Sign On, add HomeController in both WebApp1 and WebApp2. Do not forget to add Authorize attribute on the HomeController, that will send the unauthenticated users to SSO Login.

  [Authorize]
public class HomeController : Controller
{
  //
  // GET: /Home/

  public ActionResult Index()
  {
    return View();
  }
}

11. Add Index view for the HomeController in both WebApp1 and WebApp2 respectively.

WebApp1/Home/Index.cshtml

@{
    ViewBag.Title = "Web App1 Home";
}

<h2>Web App1 Home</h2>

Logged in as @User.Identity.Name

WebApp2/Home/Index.cshtml

@{
  ViewBag.Title = "Web App2 Home";
}

<h2>Web App2 Home</h2>

Logged in as @User.Identity.Name

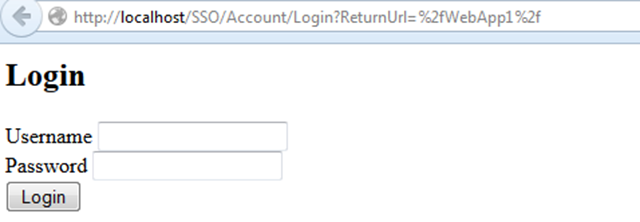
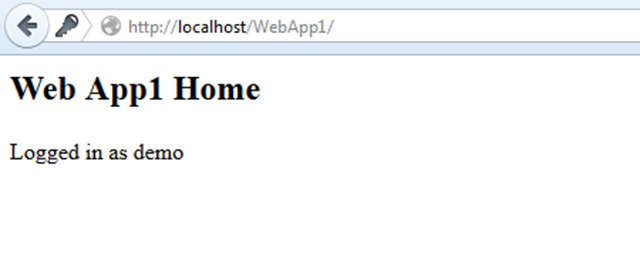
12. Now browse for http://localhost/WebApp1 it will automatically redirect to http://localhost/SSO/Account/Login?ReturnUrl=%2fWebApp1%2f

image

13. Login using Username and Password as demo. On logging in successfully it will automatically take you to http://localhost/WebApp1

image

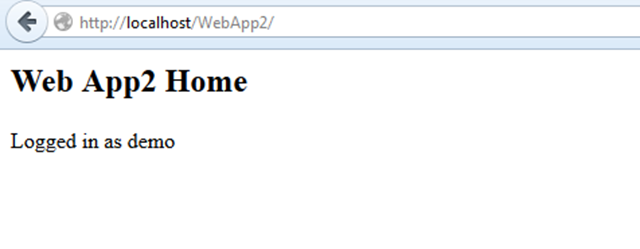
14. Now try to browse http://localhost/WebApp2/. You will see that it automatically login and it shows message as Logged in as demo.

image

You can get the source code for demo from GitHub https://github.com/arunendapally/SSO.